Downgrade (huge) Microsoft SQL database
How to downgrade MS SQL database we can find from web-search. Its discribe simple method – use "Tasks – Generate Scripts…" with data and Win!
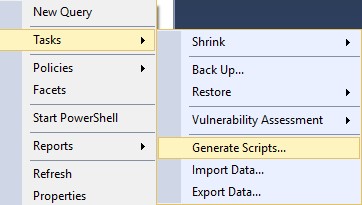
standard downgrade method
But! If you have huge database’s size, you cannot use that method. For example: My 10 Gb database, have exported size – 50 Gb. No one text editor can handle this size of plane text file, including command-line import (because its import data from text file line by line and some data cannot be inserted in buffer).
Here is article to help you downgrade huge database in "simple" way.
Simple in quotes mean, that you should do some changes manually (sorry, i haven’t time to make correct regular expression for this step).
WARNING!!! All actions are performed at your own risk.
WARNING!!! Read postscriptum.
Step 1. Use "Tasks – Generate Scripts…" on source server with following parameters:
"Choose Objects" – select entire database and all database objects
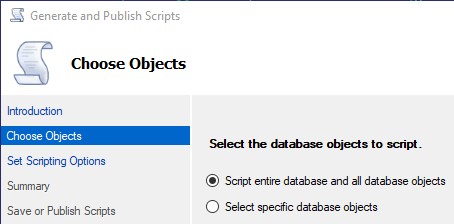
Choose Objects
"Set Scriptiong Options – Advanced" – options:
- Script for Server Version – select version on downgrade server;
- Script for the database engine edition – select edition;
- Types of data to script – Schema only;
- Script Foreign Keys – True;
- Script Indexes – True;
- Script Primary Keys – True;
- Script Triggers – True;
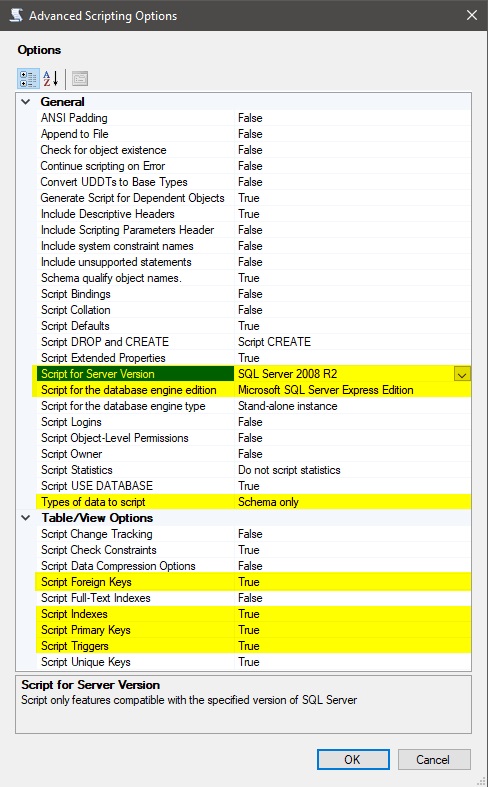
Advanced Scripting Options
Save file.
Step 2. Open generated SQL file in favorite text editor. Select first some lines that’s create and configure database (create, alter, alter…). Create database with this scripts on target server.
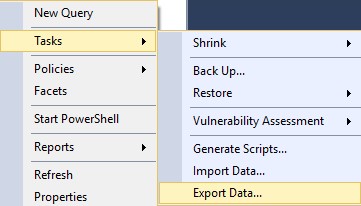
Export Data wizard
Step 3. Use "Tasks – Export Data…" on source server with following parameters:

- "Choose a Data Source" – SQL Server Native Client XX.X (where XX.X you version of installed components). Fill source server connection fields;
- "Choose a Destination" – SQL Server Native Client XX.X (where XX.X you version of installed components). Fill destination server connection fields;
- "Specify Table Copy of Query" – Copy data from one or more tables or views;
- "Select Source Tables and Views" – Select all tables, except views (first icon for tables, second for views); Wait for all data migrated correctly.
Step 4. Here is "simple" step, to complete migration:
Open sql file generated in step 1 in favorite text editor. Remove previously copied (step 2) lines thats creates and configure database. Change all lines create table to alter table. Invoke changed script on target server.
Done!
P.S. "Tasks – Export Data…" cuts seconds and milliseconds. If this is principal, you should not use this article.
P.P.S. Export operations performed in Microsoft SQL Management Studio.